
Generate Your Astrocartography Map (using my site)
If you’ve been here for a while, you may recognize some of this process. I’ve previously shared a guide on how to generate an astrocartography map using external tools.
As my work has grown, so has the way I want to support you.
This post exists specifically to walk you through how to generate and explore your astrocartography map using the interactive Maps feature on this site. This is a tool designed to make locational astrology more visual, intuitive, and grounded in lived experience.
Whether this is your first time exploring astrocartography (more info for you here) or you’re revisiting it through a new lens, this guide will help you get oriented and start exploring with confidence.
Step 1: Gather Your Birth Information

To generate your map, you’ll need:
Your date of birth
Your exact birth time (as close as possible)
Your place of birth
Accuracy matters, especially for angular lines (Ascendant, Descendant, Midheaven, and IC). If you’re unsure of your birth time, you can still explore the map, but some lines may shift slightly.
Step 2: Generate Your Map
Once you’ve entered your birth information, click Generate Map.
The map will load with planetary lines spanning the globe, along with a star marking your place of birth. Each line represents a planet interacting with one of the four main astrological angles.
Step 3: Understand What You’re Looking At
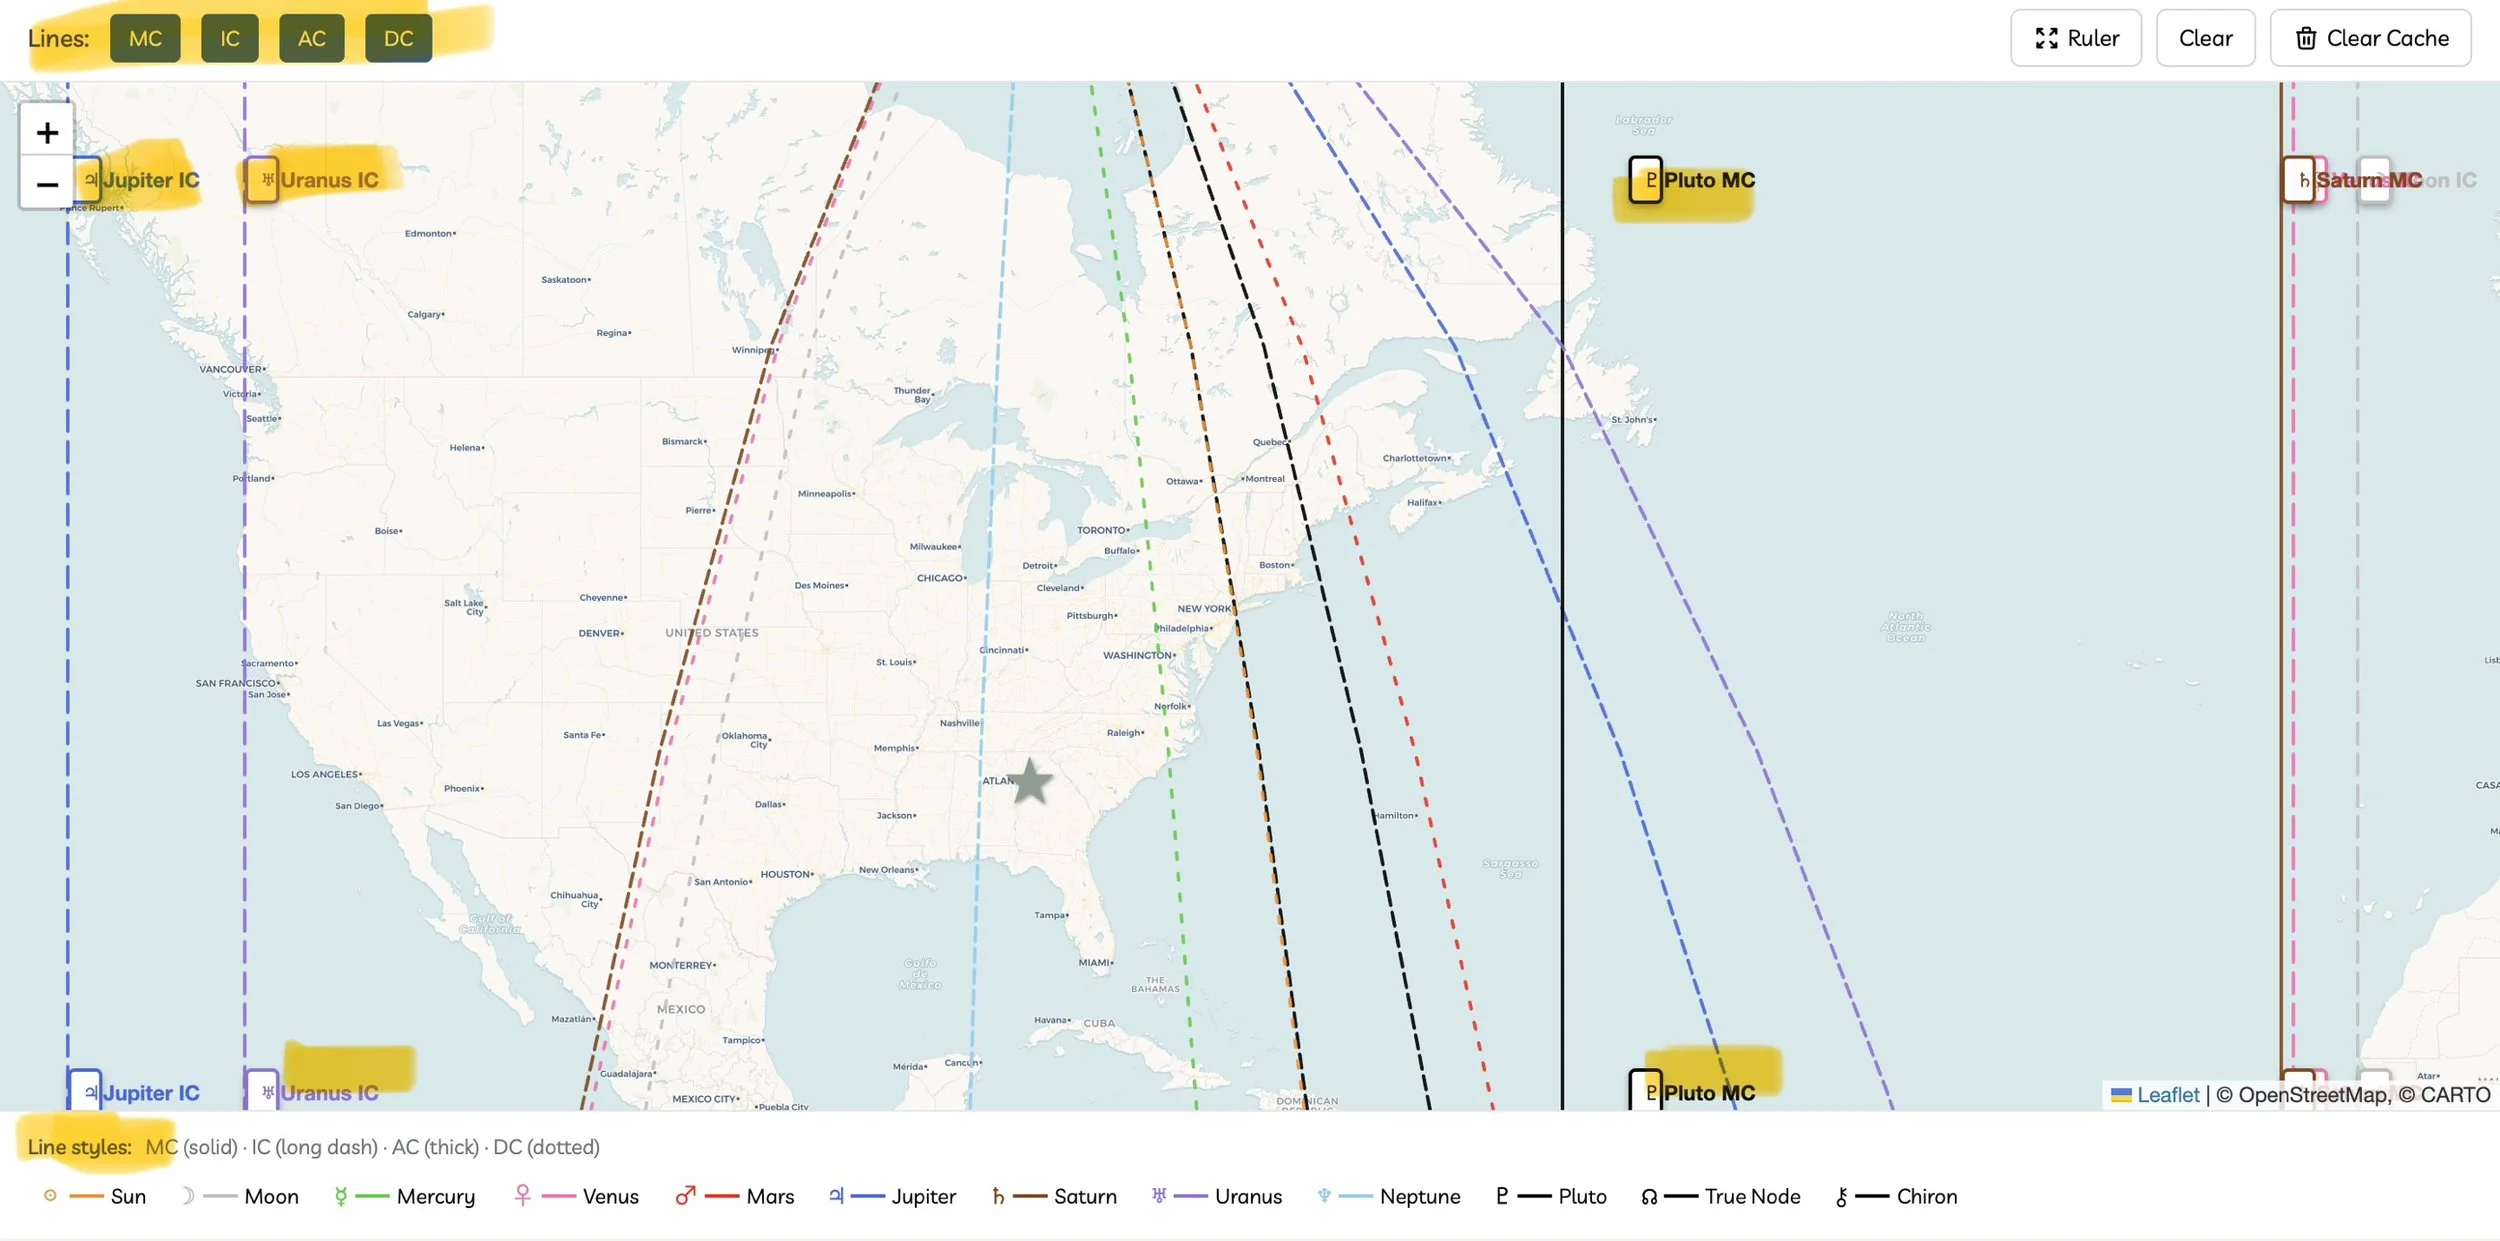
Planetary Lines
Each line corresponds to a planet from your birth chart. These lines show where that planet becomes especially emphasized when you live, work, or travel in that region.
Angles (Line Styles)
The angle of the planet determines how its energy tends to show up. Each angle is represented by a different line style:
MC (Midheaven) — solid line
IC (Imum Coeli) — long dashed line
AC (Ascendant) — thick line
DC (Descendant) — dotted line
These angles relate to visibility, inner life, identity, and relationships, respectively.
Legend
At the bottom of the map, you’ll find a legend showing:
Planetary symbols
Color coding for each planet
Line styles for each angle
Use this legend as a reference while exploring.
Step 4: Interact With the Map
You can explore the map dynamically:
Hover or click on a line to see the planet and angle name appear near your cursor.
Zoom and pan to explore specific regions.
Notice clusters or crossings, which can indicate areas of heightened activity or complexity.
There’s no right or wrong way to explore, just let curiosity guide you.
Step 5: Use the Ruler Tool to Measure Distance
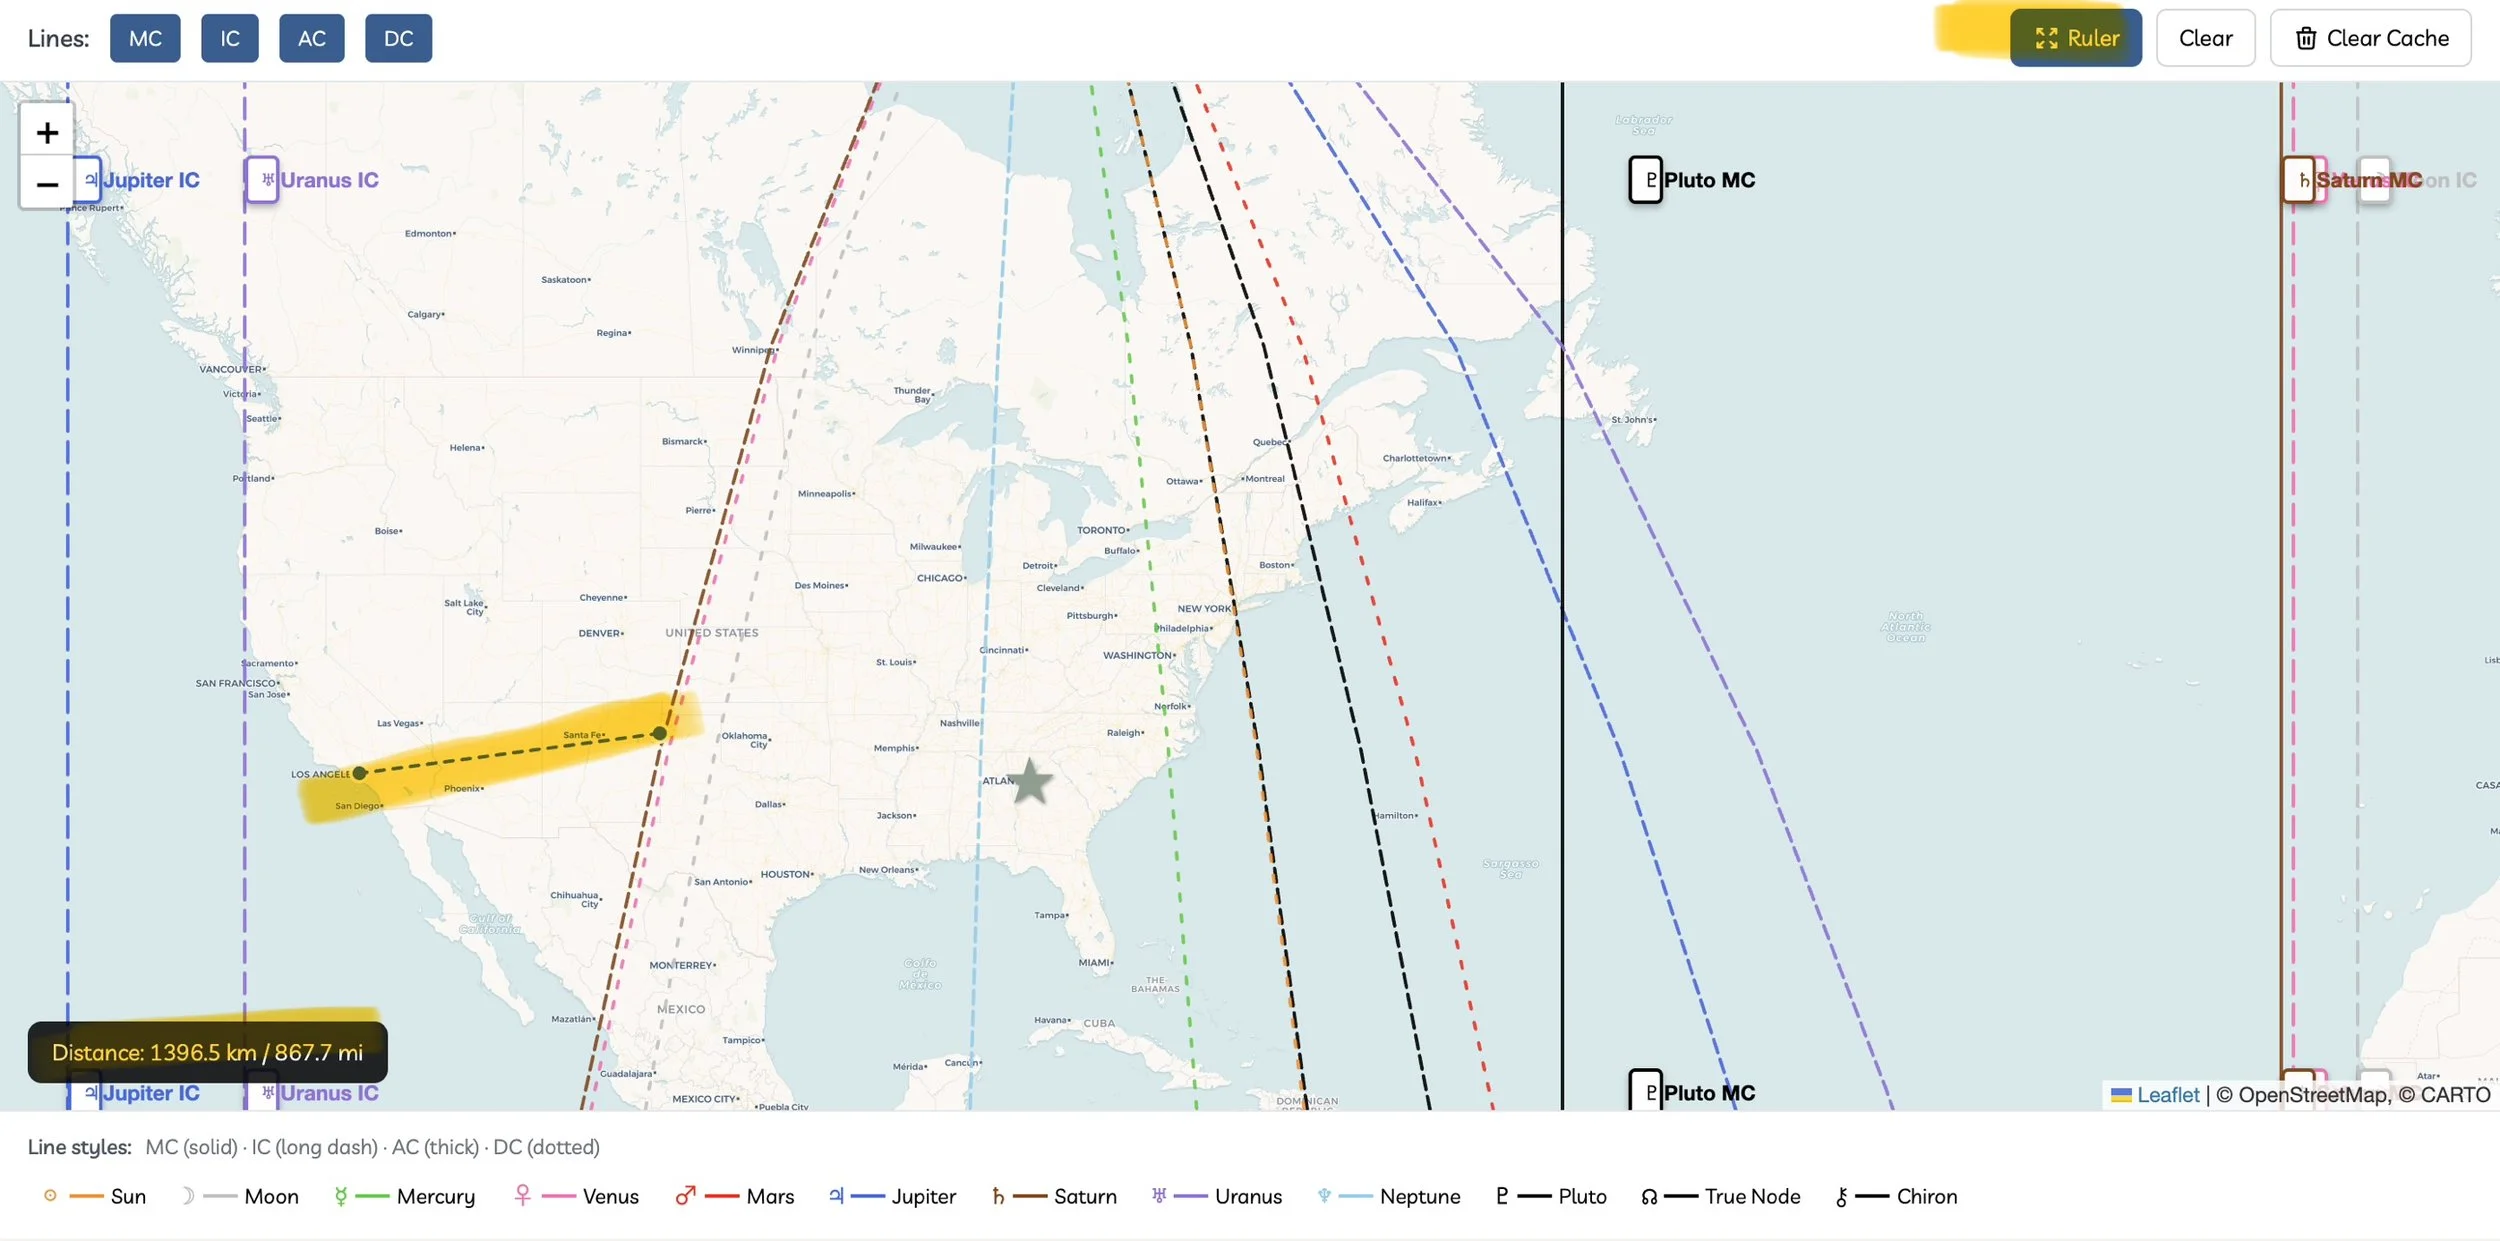
Astrocartography doesn’t require you to be exactly on a line for it to be felt.
The built-in ruler tool allows you to measure the distance between:
a location and a planetary line
your birthplace and other regions
two different places on the map
Many astrologers work with a range or orb of influence, meaning a line can still be relevant within a certain distance. The ruler helps you decide what feels meaningful for you.
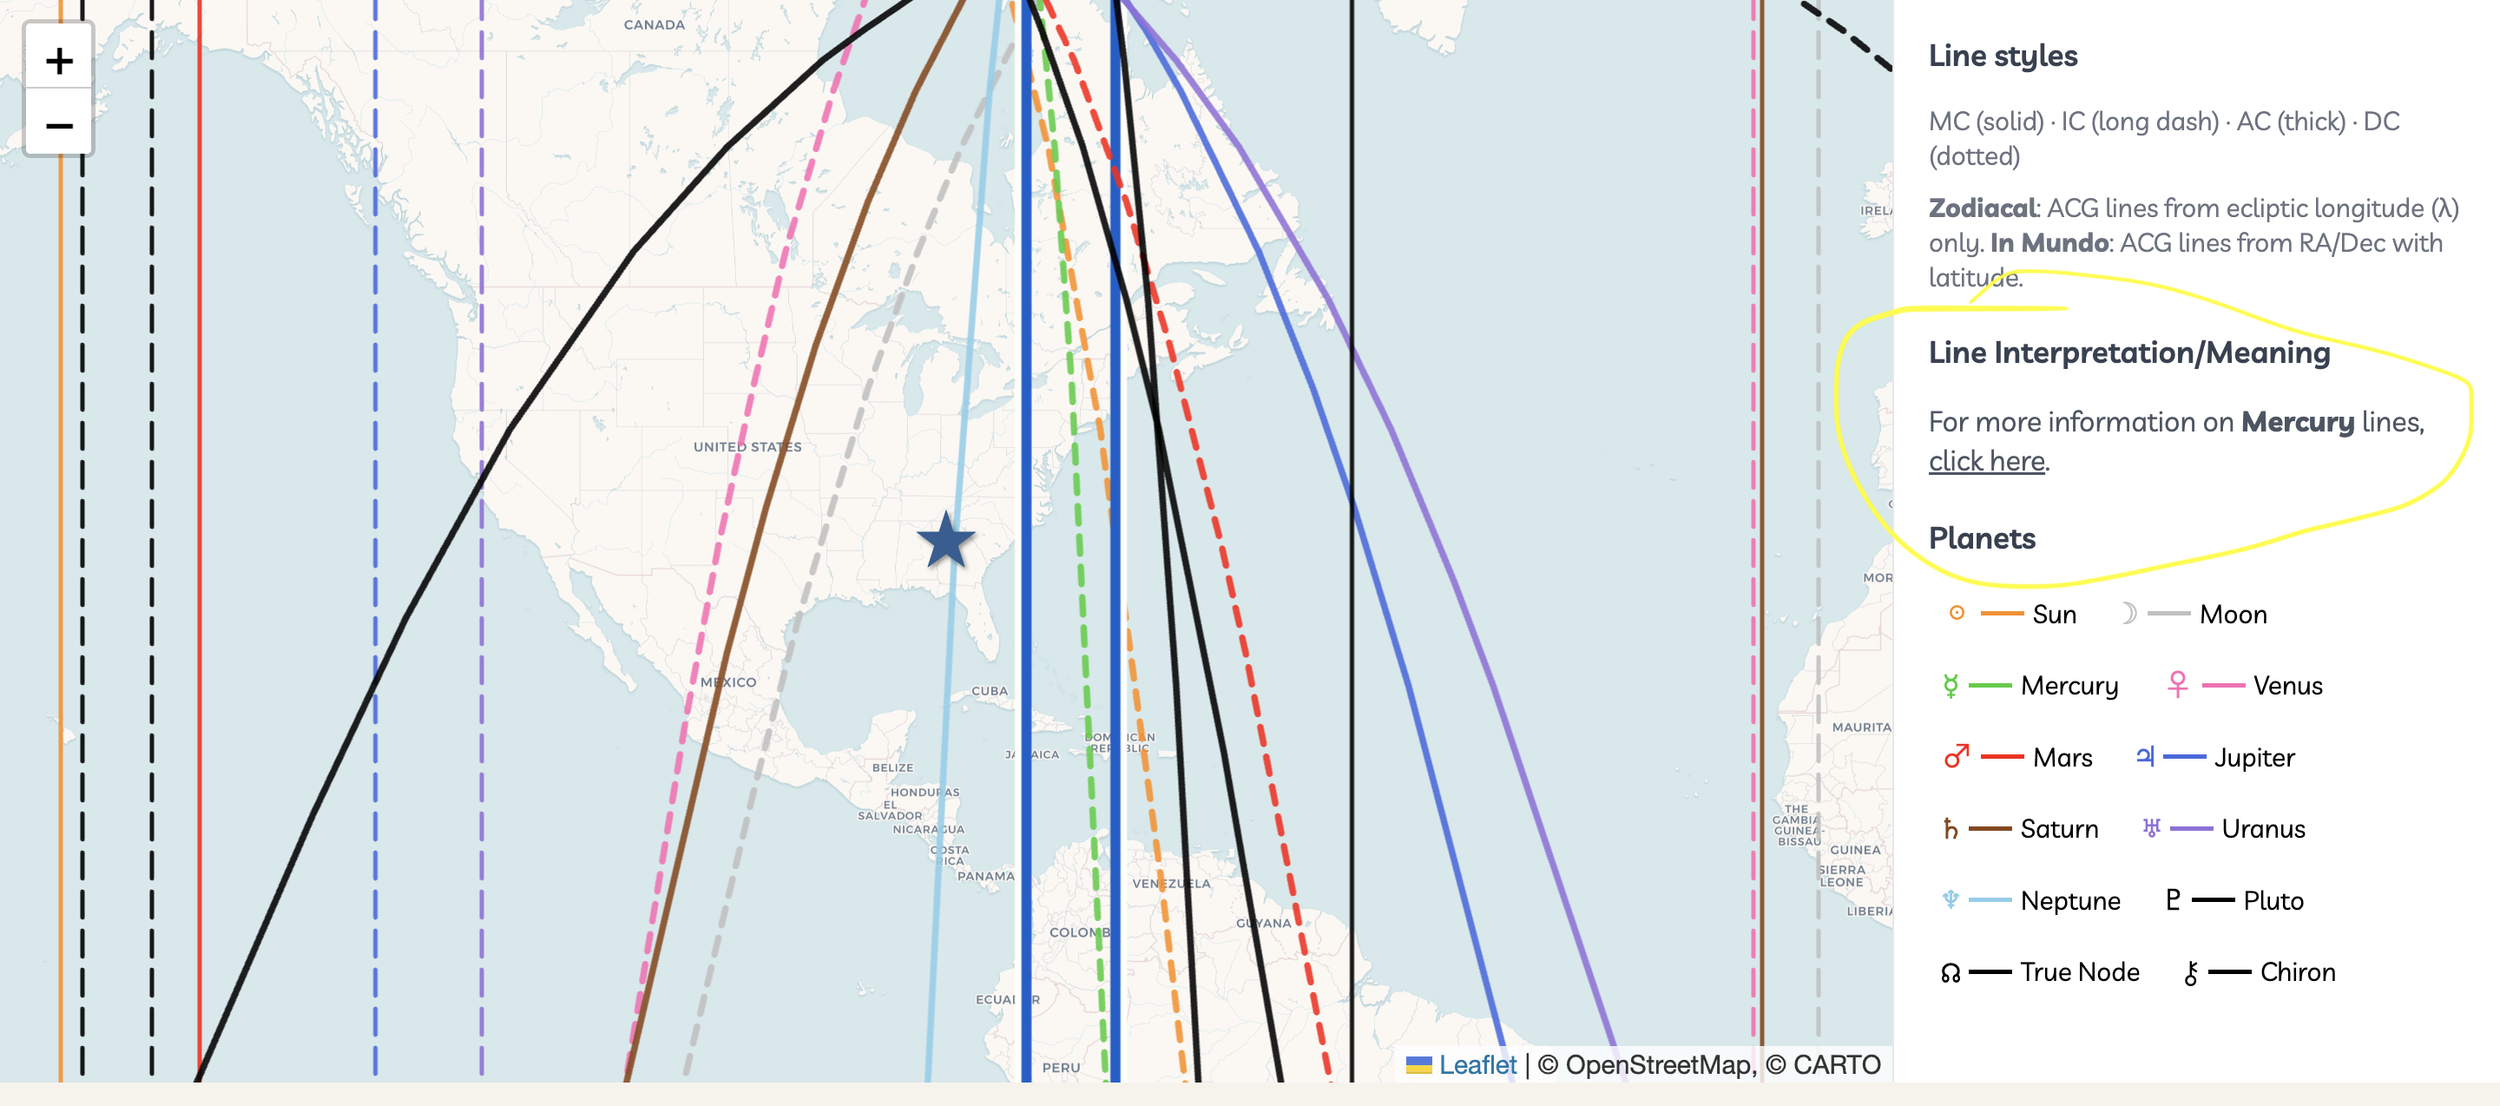
Step 6: Click Any Line to See the Corresponding Blog Post
In an effort to assist you with understanding your map more clearly, the astrocartography lines on the map are hyper linked to my blog posts!
Try clicking a line and doing the following:
Navigate to the legend box at the bottom of the screen (mobile view) or to the side (desktop view)
Click the link under the ‘Line Interpretation/Meaning’ section
The blog post will open up in a new window
Use this Maps feature to interpret your Astrocartography Map!
\
Each blog post covers each angle type.
Step 7: Notice Patterns From Your Own Life
One of the most insightful ways to use Astrocartography is retroactively.
Try looking at:
places you’ve lived
places you’ve traveled to
places you feel drawn to but haven’t visited yet
You may notice themes that align with planetary symbolism or significant life chapters. This tool is meant to help you connect lived experience with astrological patterns.
A Note on Accuracy & Ephemeris Data
This map is generated using a different ephemeris and calculation system than some other popular astrology software or websites.
Because of this, your map may look slightly different from maps generated elsewhere. These differences are normal within astrology software, and the calculations are very close.
Accuracy and refinement are ongoing priorities, and the tool will continue to evolve over time.
How to Use This Tool Thoughtfully
Astrocartography is not about prescribing where you should live or travel.
Instead, it’s a way to:
understand why certain places feel supportive or challenging
explore potential themes before moving or traveling
reflect on how place and astrology intersect in your life
For deeper insight, context, or personal guidance, this tool works best alongside interpretation, reflection, and one-on-one readings.
Save This Map as a Web App (Quick Guide)
You can save this map to your phone or computer and use it like an app (no App Store download required).
On iPhone (Safari)
Open the map in Safari.
Tap the Share icon (square with the arrow).
Select Add to Home Screen.
Rename it if you’d like, then tap Add.
The map will now appear on your home screen and open in full-screen mode.
On Android (Chrome)
Open the map in Chrome.
Tap the three dots menu.
Select Install App or Add to Home Screen.
Confirm when prompted.
The map will be added to your home screen and app drawer.
On Desktop (Optional)
Some desktop browsers also allow you to install this as an app:
Open the map in Chrome.
Look for the Install icon in the address bar, or open the browser menu.
Click Install.
This creates a standalone app window on your computer.
Why Save It?
Quick access from your home screen
Full-screen, app-like experience
Easy to revisit while planning travel or relocation
Updates automatically (nothing to reinstall)
Remember…
Your astrocartography map is not a final answer, however it is an invitation to explore!
Take your time with it. Revisit it as your life changes. Let it inform, not dictate, your relationship with place.
If you need assistance, feel free to book a reading here or check out the Foundations of Astro Mapping Course.
—Faith <3